|
|
 auf Deutsch verfügbar |

|
| The original |
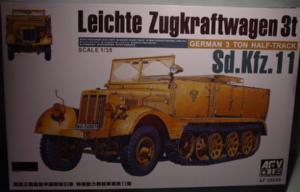
The Sd.Kfz. 11 was produced between 1937 and 1945. Amongst others the companies of Hanomag, Borgward, Horch and Adler delievered some 25.000 examples of the vehicle. Main task of the 3t halftrack was to pull light guns and "Nebelwerfer". The chassis was later also used for the construction of the Sd.Kfz. 251 series.
| The kit |
I have been waiting for this kit for years ! Some 5 years ago, I' built Alby's Sd.Kfz. 11 - a nice kit as such, but due to the poor fitting and the lack of details, the final result was not really satisfying. Moreover when considering the high price by then - it was complete resin model!
AFV Club's injection moulded kit already makes a good first appearance, when taking a glance into the box. The seven light brown sprues are filled up with a mass of parts, added to these is a runner with clear parts for the windscreen and lights. Moreover the kit includes two flexible tracks, which can be regarded as the best of their kind, and a small frame containing four pe parts, of which the two bigger parts are already bent.
| The assembly |
Construction
begins with the chassis. In step 1 you have to take care with parts E1,
as these are very fragile - further no problems. Steps 2, 3, 4 and 5 don't
make any problems, but
be aware that parts A12 and A5 look quite similar and can easily be confused.
The wheels
of step 6 fit very well, the drive sprockets fit in tightly, so take care
of good dryfitting before you glue them into place. Steps 7, 8 and 9 contain
the assembly of the front axle, furthermore the running wheels are attached
to the chassis. If you want to display the front wheels in a turned position,
now is the time for action. Simply cut the axles, sand them and glue them
together in the desired
position.
Modellers
without any previous experience in handling photo etched parts will have
to take care in step 10 - these parts
have to be fixed with the use of super glue. Front axle and cabinefloor
in step 11 don't mean any trouble.
In step 12 we begin with the interiour of the driver's compartment, which
is completed in steps 13 through 18. I can give the readers some advice
here - one should assemble the bigger parts first, thus completing the
whole compartment. Only then the smaller parts should be fitted, as otherwise
they are endangered to break of during fitting and aligning the bigger
parts. The chance of loosing some of the small parts forever are quite
good. In step 18 we again handle a pe part - this time the company's emblem.
Step 19 contains
the exhaust. This remains accessible, so I glued it into place right now.
In steps 20, 21 and 22 it is time to take a look at the storage compartment.
I fixed the doors in the closed position, but at the moment of writing
I am building a second Sd.Kfz. 11, with a complete scratch build interiour
and cab (these items will be available through Scale-Line soon).
Step 22 needs our attention again, as parts E29 and E30 are a bit too
long and must be sanded accordingly. Seats and rear supports fit nicely
though.
The tracks are fitted to the vehicle in step 23. Quite astonishing, the
tracks are too short - 3
links on the left and 2 links on the right side (?!) - kind of a miracle,
but yet easy to compensate, as the vinyl tracks can easily be treated
with normal plastic glue.
Done :o) !!!!
Now we just have to make our choice from one of the 6 options for various divisions and theaters of operations...
1
* Unknown unit, Poland 1939 in panzergrey.
2 * 119. Pz Art, 11. Panzer Div, Eastern front 1941 in panzergrey.
3 * 33. Pz Art, 15. Panzer Div, Afrika Korps in sandyellow.
4 * 89. Pz Art, 24. Panzer Div, Eastern front 1942 in panzergrey.
5 * 3. SS Panzer Div, Kharkov 1943 in panzergrey with winter white wash.
6 * 4. Pz Kp "Grossdeutschland" Panzergrenadier Division, 1942 in panzergrey.
| Painting / wheathering |
 I
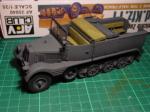
decided to go fot the fifth option. I thus sprayed the complete vehicle
in panzergrey at first.
Next
I did the rubber parts, such as the front wheels, the running wheels and
the drive sprockets, using a very fine brush and a mixture of earthbrown
and black.
The white wash was applied with a soft brush made from martenhair. The
mud is applied with an older and slightly rougher brush in the next step.
The mud basically consists of a mixture of white glue, water, and a variety
of four earth tones from acrylic paint.
Die paint chips and final wheathering are not yet visible on the photos,
as I wait with these steps, until I fit the model into it's diorama.
I plan to attach a 10,5cm FH 18 to the Sd.Kfz. 11 and let the drive through
rough mud on the eastern front.
| Conclusion |
As a conclusion
I must say this is a fabolous kit, which is filling a gap that existed
in the injection-moudled sector for the a long time. The final sales price
will be between 40 and 45 Euro, a price this kit is certainly worth.
To keep it short - this is a MUST HAVE for halftrack fans ! WELL DONE
AFV CLUB !!!
| Price/value | ***** | Fitting: | ***** |
| Details: | ***** | Skill: | ***** |
Recomended reading :


©
2/2002 Danny Raadtgever
