|
|
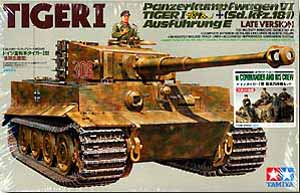 |
| The model |
Tamiya's Tiger
I Ausf. E with steel wheels is available for quite a while now and has
set the standard in this scale in regard of quality fpr injection moulded
kits.
This year Tamiya ungraded the kit by adding four figures. The kit includes
plastic single link tracks.
One can either build a "late version" or a "final version",
which I decided to build.
| Construction |
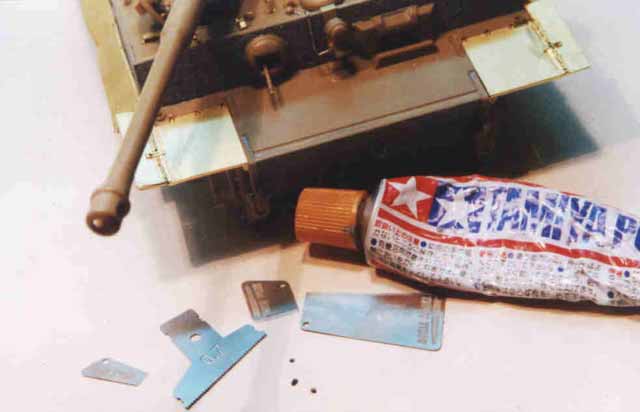 Building
the Tiger, one can proceed according to the instruction sheet - only when
using the ABER PE Sets (Sets Nr. 35015, Nr.35A10, Nr.35A12), the respective
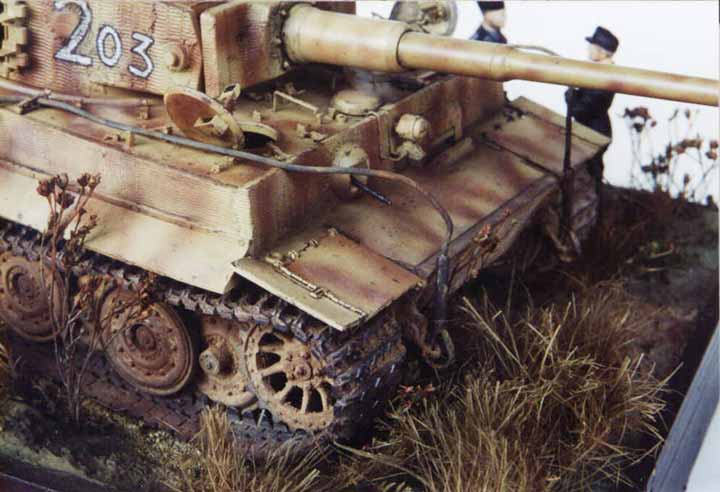
parts have to be exchanged. All Tiger I with steel wheels had Zimmerit
applied. Deviating from the manual, I assembled the hull and turret so
far, that I could apply the Zimmerit coating. For imitating the Zimmerit,
I used Tamiya putty and the Zimmerit application tools from Royal Model
(original sytle) and Tamiya (rougher pattern on the turret). As the putty
dries up very quick, one can only work in small areas. The consistency
is soft and allows the putty to be applied in very thin layers. In order
to prevent the putty from sticking to the application tool, the latter
should be dipped into Isopropylalkohol (drugstore). Damages to the Zimmerit
should mbe made, while the putty is still wet.
Building
the Tiger, one can proceed according to the instruction sheet - only when
using the ABER PE Sets (Sets Nr. 35015, Nr.35A10, Nr.35A12), the respective
parts have to be exchanged. All Tiger I with steel wheels had Zimmerit
applied. Deviating from the manual, I assembled the hull and turret so
far, that I could apply the Zimmerit coating. For imitating the Zimmerit,
I used Tamiya putty and the Zimmerit application tools from Royal Model
(original sytle) and Tamiya (rougher pattern on the turret). As the putty
dries up very quick, one can only work in small areas. The consistency
is soft and allows the putty to be applied in very thin layers. In order
to prevent the putty from sticking to the application tool, the latter
should be dipped into Isopropylalkohol (drugstore). Damages to the Zimmerit
should mbe made, while the putty is still wet.
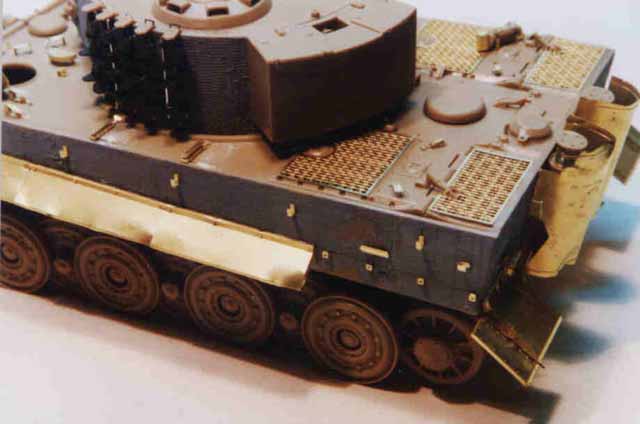 As
soon as the Zimmerit coating is dry, the area is cleaned and the construction
can continue according to the instructions.
As
soon as the Zimmerit coating is dry, the area is cleaned and the construction
can continue according to the instructions.
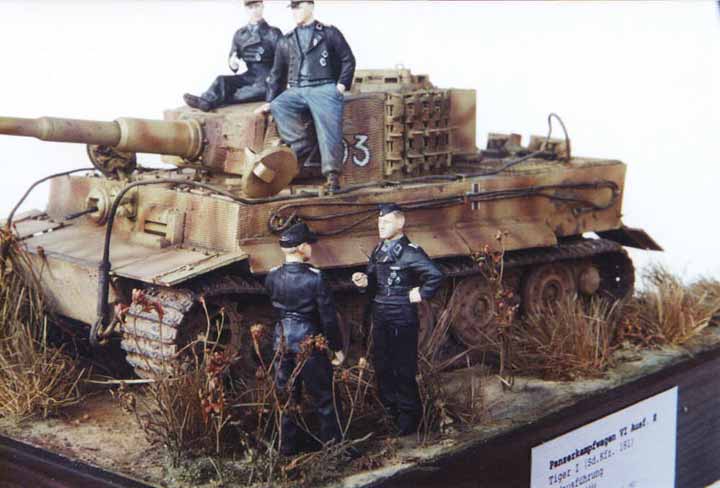
PE parts can be positioned on the Zimmerit without problems, one should
only take care, that the areas that are to be glued are even.
For the fixation of the sideskirts made from PE parts, I poured pouder
in the edges between hull and skirts and soaked these with super-glue.
Using this method the skirt's hold are so solid, that they can easily
be bent on the model.
ABER's PE parts are an enormous boost to the models appearance.
| Painting, wheathering and decals |
 A
problem in modelling is, to bring the light-refelexes from 1:1 to 1:35th
scale. We want to produce a copy of a real tank - so we have to take care
to paint the model in a way, that when looking at, we get the impression
to look at a real tank!
A
problem in modelling is, to bring the light-refelexes from 1:1 to 1:35th
scale. We want to produce a copy of a real tank - so we have to take care
to paint the model in a way, that when looking at, we get the impression
to look at a real tank!
My method is as follows and will be described using this Tiger as an example.
As basecoat I use Tamiya XF-60 (dark yellow). For highlighting I added
about 40-50% white to the base colour. Camouflage stripes were added using
Humbrol colours (mixture of no. 160 redbrown and´ca. 20% no. 186
brown). For the painting I used a Badger 150 airbrush with fine nose.
Generally the
camo-stripes should be varied in colour, in order not to get a too uniformed
appearance of one's collection. The original camo-pastes were thinned
with water or oil / fuel by the troops and did differ in their tones as
well.
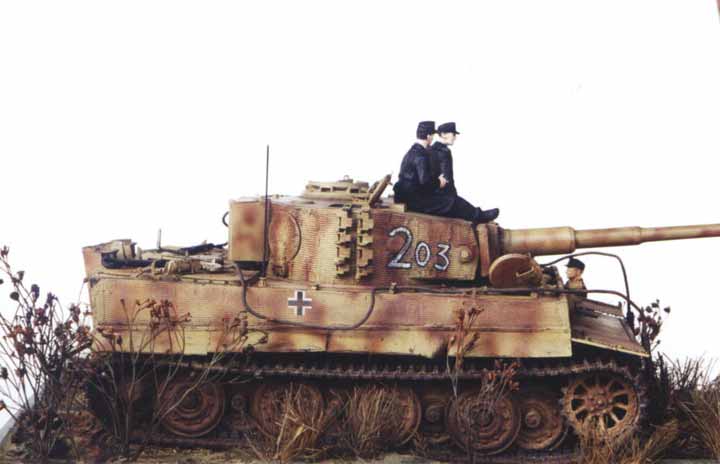
The s.Pz.Abtlg. 507 had a unique method of painting their turret numbers.
The first digit was almost turrethigh, the following digits were only
about 60% of the height. As there are no appropriate decals for these
numbers, I had to paint them by hand.
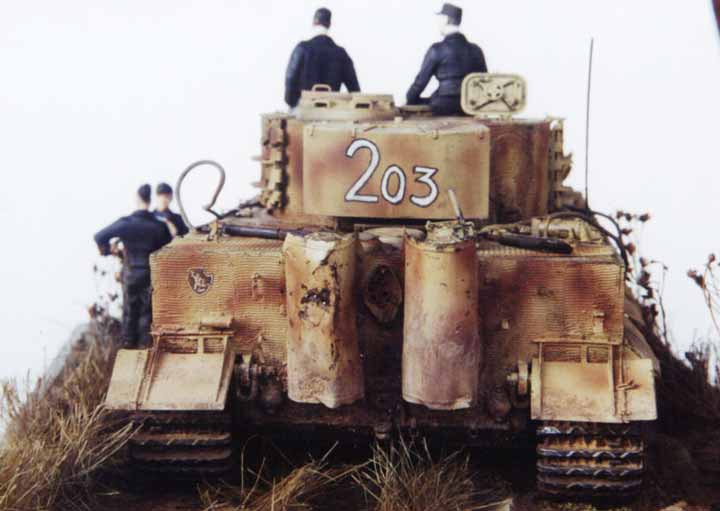 Following
a layer of gloss varnish was applied as a base for the decals (Balkenkreuz
and divisional sign) - as these were finished, a coat of matt varnish
was sprayed. Matt varnish is a means to influence the light reflections.
For the first time I used the technique of micropainting. With a very
fine brush smallest scrapes and damaged colour surfaces were done accordingly.
Following
a layer of gloss varnish was applied as a base for the decals (Balkenkreuz
and divisional sign) - as these were finished, a coat of matt varnish
was sprayed. Matt varnish is a means to influence the light reflections.
For the first time I used the technique of micropainting. With a very
fine brush smallest scrapes and damaged colour surfaces were done accordingly.
Only at this stage shading and wheathering started. using oilcolours and
pastellchalks both glossy and matt effects can be achieved. The oilcolours
(black and vandyckbrown) were applied using the airbrush. This results
in a dirty look of the model with a shaded surface and the mixture still
pours into the deeper areas, creating the effect of shadows. Other effects
like rust and oil can also be imitated using oilcolours.
With pastellchalks I resembled dust and smoke. I do not fixate the chalks
by spraying matt varnish however, in order to keep the dusty looks of
the chalks.
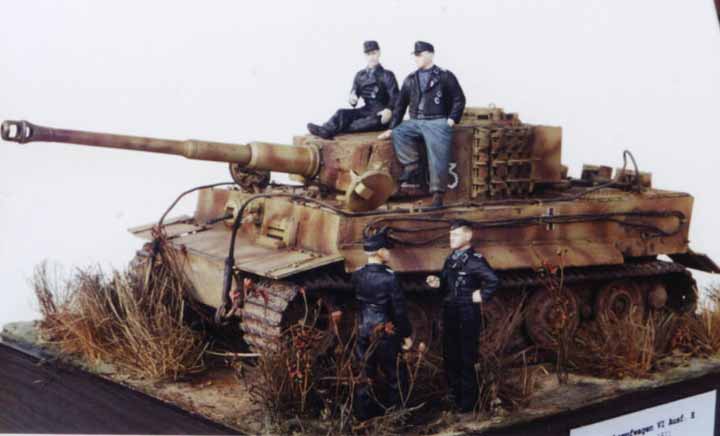
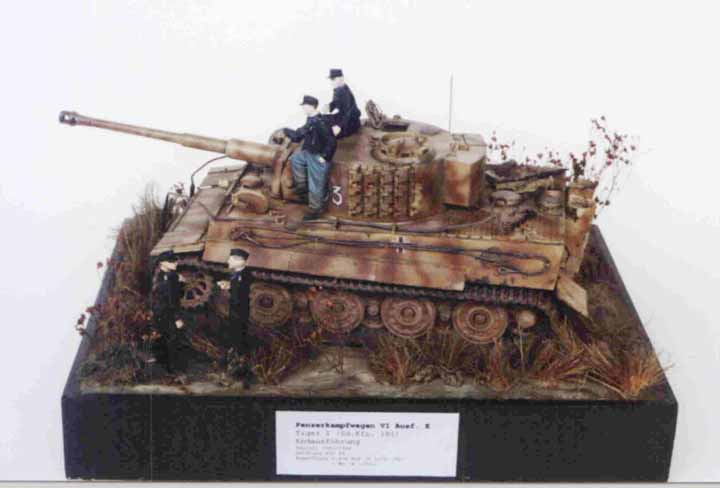
| Figures and diorama |
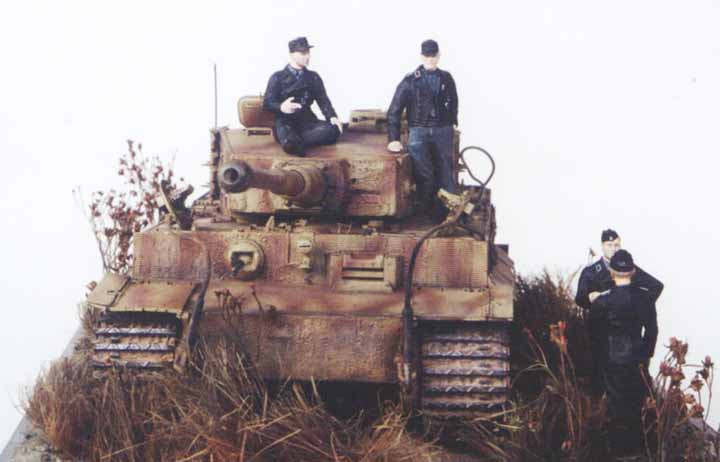
The figures
included in the kit have nice poses and are modelled very well. However
I only used two of them. I did not like the laughing impression of the
faces, that's why I exchanged them with heads from DML. Moreover other
DML figures were used.
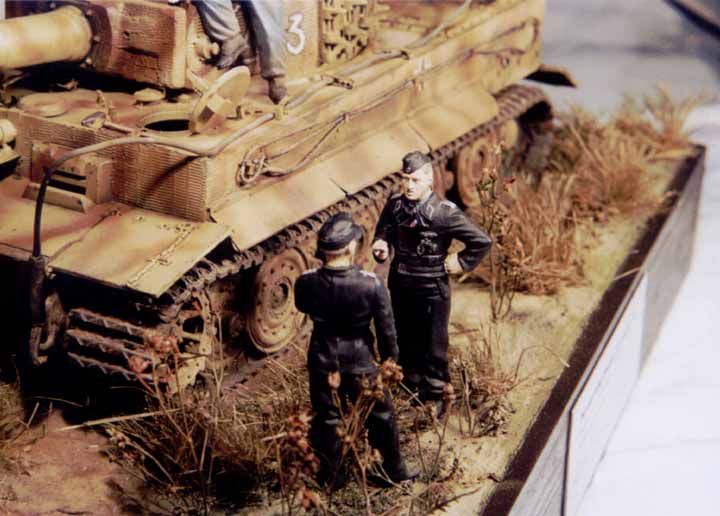 The
diorama was modelled using Molto-Fill putty and other materials. The assemby
was sprayed with old Humbrol colours (rougher pigmentation) which I do
not use for my models anymore.
The
diorama was modelled using Molto-Fill putty and other materials. The assemby
was sprayed with old Humbrol colours (rougher pigmentation) which I do
not use for my models anymore.
It is always worth buidling a Tiger - it is and allways will be an impressive
armoured fighting vehicle and with the PE parts from ABER there won't
remain any dreams unfullfilled.
W. Schneider's two books "Tiger im Kampf" offer a large variety
of camo-shemes.
| Price / value: | ***** | Part's fit : | ***** |
| Detail: | ***** | Skill: (with/without Zimmerit) |
***** ***** |
Literature:
Tiger im Kampf Bd. I; W. Schneider
Pz.Kpfw. Tiger; W.J. Spielberger.
Versch. Waffenarsenal Bände
Versch . Concord Bände
Tiger Iⅈ T.L. Jentz
 |
 |
 |
 |
© 10/2001 Roland Greth