|
|
|
Deutsch verfügbar |
 |
 |
| The original |
Originally intended as a training vehicle and interim solution till the development of the medium battle tanks Panzer III and IV, the Panzer I went into production in 1934. Based on a Carden-Lloyd running gear more than 800 units of the Ausführung A were produced. Protected by a meager 14,5mm of armor, this little tank was armed with two 7,92mm MG 13 with 2250 rounds of ammo. The Krupp M305 engine with 57 HP propelled the 5,4t vehicle to a maximum speed of 37 km/h.
Production ended in 1936 and even though this tank was by far too weak in regards of armour and armament, it even saw action in the beginning of the russian campaign.
| The kit |
An early Panzer I ... hurray ...as the HiPM kit resembled the original more bad than right, it could become only better and rumours about the quality of the Tristar kit began spreading quickly.
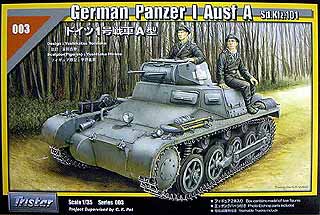
So, what are we offered for the high price of more than 40 € ? The box contains six compact sprues with nicely molded and detailed parts, the hull, a PE set for the exhaust cover and a Modelkasten single link track. The latter makes a very good impression, but certainly isn't everybody's favour, as it is a glue-free plastic snap tite system.. As said before, the parts are very well detailed - to say the least. Every nut and bolt is resembled correctly and all parts have the finest marks to show the exact glueing locations. Moreover the kit contains two very nice figures, with three heads.
The instructions are easy to understand and won't leave a question unanswered. Also the painting instructions for both tank and figures are very well.
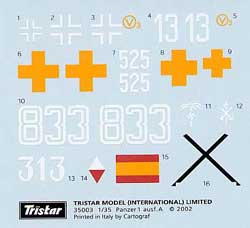
The decals offer the choice for four variants: one each for the polnish, norwegian and african campaigns, as well as one vehilce from the spanish civil war. As to how far the yellow crosses are historically correct, I will leave undiscussed - the decal's quality however is excellent.
| Construction |
 Construction begins with the running gear ... the excellent wheels are attached to the swing arms. With a little concentration the wheels will remain turnable. The ones how had the "pleasure" of building the HiPM kit before will have tears of joy in their eyes - running gear components that fit together perfectly! Wow! Where there is light, there also is shadow - as the swing arms will be glued to the hull, the running gear will not be workable anymore. A pitty, as the Modelkasten track and he overall quality of the kit would have demanded it. Drive sprocket D10 should be glued in a way that it remains turnable, as this makes attachement of the tracks far easier later on! After the completion of the running gear, one should check the
 alignment of the roadwheels. Now it is time to attach front- and rearplates to the lower hull, as well as an engine bulk head. The bulk head is nice to look at, but it also reminds us, that there is a total lack of interior! The hatches can be build in the open position, but all we see inside is a black hole - so we should rather leave them closed.
Upper hull and the upper front and rear parts will be joined in the next step - their fitting is simply superb! Don't forget to glue part D4 from the inside before this.
 The turret too can be finished quite quick. No points of criticism here regarding exterior details or fitting of the parts. The vision ports are molded in the correct thickness, the hooks look quite okay. The original Panzer I A's twin MGs were aligned a littlebit offset - the kit fully resembles this fact as well, even though the difference seems a bit too big to me.
When finished with the turret, the external parts like tools, exhausts, vision ports and additional armour will be attached to the upper hull, as well as the entry hatches for the driver. Everything is detailed well and fits just perfectly! The antenna is resonably too thick, so I replaced it with a self made one. Parts C23 should be in place before the antennamount part C2, otherwise it will not fit.
 The exhaust meshes must be turned and rolled into shape by the modeler, no sweat here though. The front fenders are made up of three parts and fit quite well. The instructions confuse parts B15 and B17 though, but this can be seen quite easily. The rear mudguards have slight fitment problems, but this can be handled easily again.
Finally we have the choice between an armoured and unarmoured version of the air intakes and outlets. I decided to go for the unarmoured variant.
At this point one should take care of the painting - before handling the tracks.
 The tracks come from Modelkasten - so not much need to introduce them again. The molding is just fine and the track remains fully workable. It would have been desireable to have more links included, as there is only one spare link per side! The joining of the tracks went without problems, beginners will have the one or the other trouble with this system. The great plus certainly is that the track remains workable, on the other hand a lot of extra time is needed compared to other track systems. Moreover the joining of the two ends is not too easy in the end.
| Painting/Wheathering |
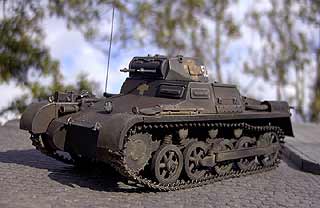
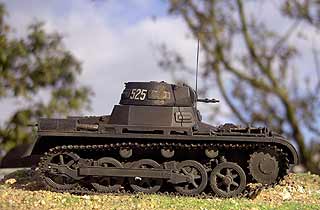
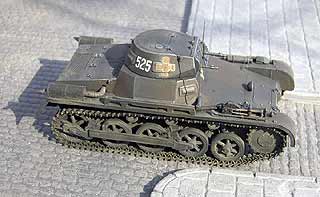
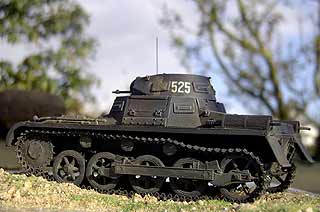
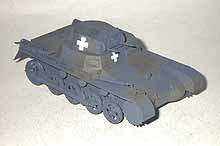 My Panzer I was to receive the paintscheme and markings from the polish campaign. It thus received a layer of Tamiya flat black primer and subsequently a layer of darkened german grey (XF-63). A bit out of the ordinary are the patches of brown colour, which were to be on the vehicles according to camouflage plans by the beginning of the war. I therefore sprayed some patches of Tamiya XF-64, which was darkend with some black. Contrast of these two coloures was quite low.
The crosses were sprayed with white colour using Express masks from Eduard, which went well even over the hatches. Turret numbers were taken from the kit's decalsheet.
 After the application of the washing mixture of black and brown oil colours mixed in terpentine the deeper parts were accentuated very well, but also the brown patches almost disappeared - pitty!
The crosses were filled with sandyellow colour mixed with pastelchalks roughly with a brush - just as the real crews did it with mud, when they discovered the white crosses were good aiming points for enemy anti-tank gunners.
Afters this the edges were drybrushed using light grey oil colours. The track was primed in black (after the assembly) and then sprayed with steelblue.
The running gear received a coat of dust, made of light pastel chalks.
| Conclusion |
A wonderful small kit with superior quality, details and fitting. Here we see the work of a team using good research and a ery well thought concept - THIS way modelling is real fun. This kit can be completed within one weekend without any problems. Yet, there are three points of criticism: the total lack of an interior which makes open hatches impossible, the fact that the running gear is not workable, even though a workable track is included and last but not least the extremely high price of more than 40€, which positions this otherwise nice and historically correct kit on the upper edge of scale, when comparing size and price. Maybe a cheaper track would have been an option ?
However this kit is abolutely recommandable, moreover as we will certainly see several interesting conversions in the near future like the Flakpanzer I which is available from New Connection.
| Price/value: | ***** | Fitting: | ***** |
| Details: | ***** | Skilllevel: | ***** |
 |
 |
 |
 |
 |
 |
 |
 |
 |
Recommend reading :


© 10/2002 Thomas Hartwig
Thank's to Rohe-Modellbau for this review sample
