|
|
|
Deutsch verfügbar |
  |
| The original |
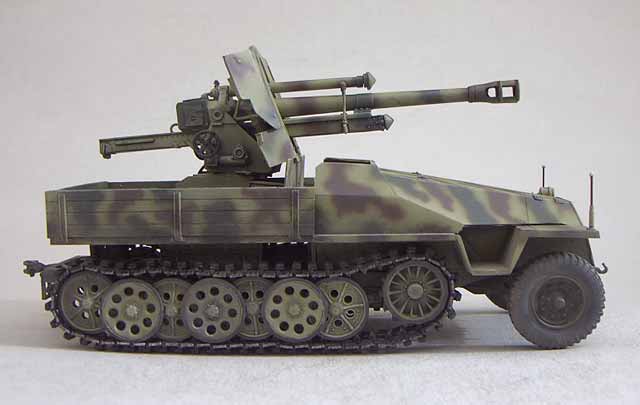
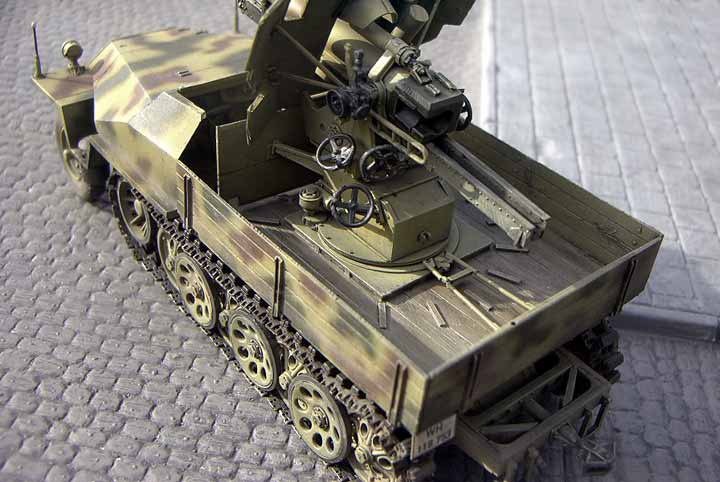
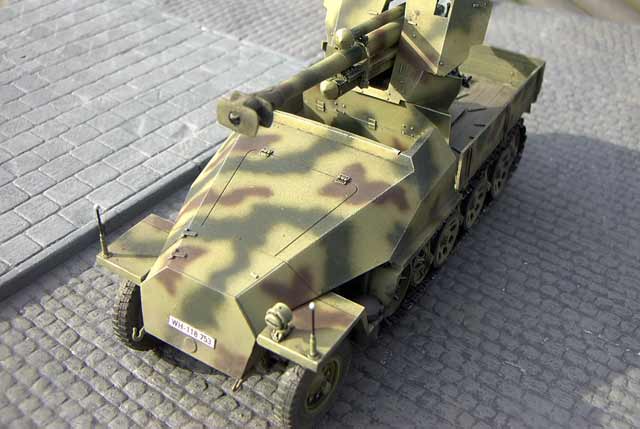
This unusual vehicle is based on the 3ton Zugkraftwagen with armored drivers cabin, like it was on the Sd.Kfz.251. The leFh18/40/1 was located on a socket fixed to the frame.
On 22nd January the first prototype was completed and displayed to Hitler. Early march Hanomag was given the order to produce four of these vehicles, which would be a battery for troop trials. Additionally a contract for production of further 50 vehicles of the 0-Serie, which should start in October 1944. The four trial vehicles were delivered to Artillerieschule II and tested. Because of bombing raids the productions was cut. There were five completed vehicles from which one was damaged in an air raid. In February Hanomag completed 12 chassis for this vehicle type, while it is unknown if they were completed and went into action.
The combat load was around 8.5 tons and the complete height of 2,69m made a high silouhette and easy target.
| The kit |

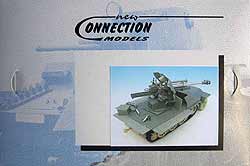
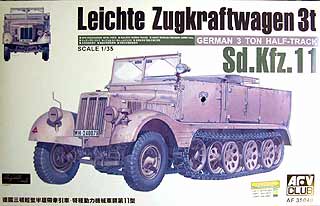
A real unusual vehicle ... a 10.5cm leFh18 on such small halftrack!? New Connection makes it possible to have this rarity, which is also shown in Panzer Tracts 10, as 1/35 conversion kit. This is based on the excellent AFV-Club Sd.Kfz.11. A good choice while the price is higher than other kits of course. About 35 Euro can be paid for the Sd.Kfz.11 but brings modelling fun at its best. The box contains 6 sprues, good vinyl tracks, and some smaller things in good quality and detail. For this conversion only the chassis and running gear is used. The instruction is extensive and very good.
The conversion kit contains about 70 good detailed resin pieces ... especially the wood structure of the platform is excellent. Also the new armored drivers cabin looks fine. The 10.5cm cannon is complete and fine detailed, also there is a turned metal barrel, the muzzle break is made of two resin parts, here you need to work very exact!
The instruction of the conversion is shown on two DIN A4 pages and is comprehensible even with the use of the original parts.
| Construction |
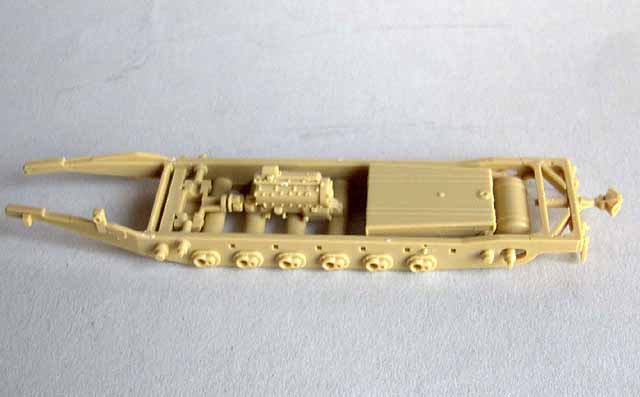 Beginning with the base kit, the Sd.Kfz.11 ... first the chassis is completed what happens very easy and quick. The parts fit together perfect. Also the parts have usable markings and fitting holes to align and place them correct so you won't have to worry about wrong placement or bending the chassis.
The wheels stations and suspension needs some more work, as you need to place each swing arm plus a stopper each arm. Additional some smaller parts for track tensioning. All these parts fit very good together. The wheels should be painted before assembly to the running gear as it is hard to reach each because of the interleaved suspension.
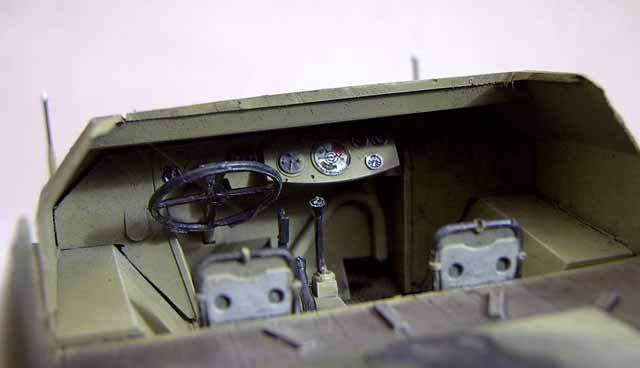
After that we can begin with the conversion kit. 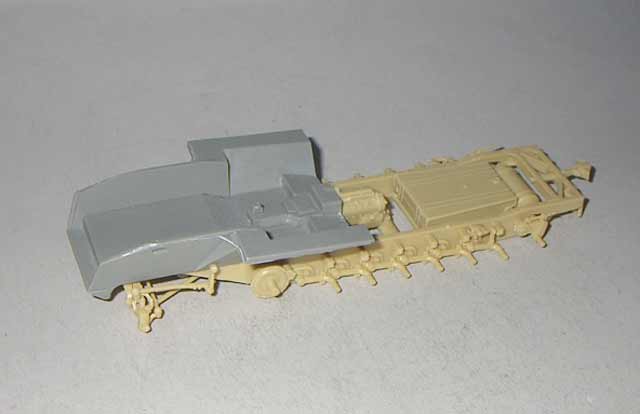 Most work is to clean up the parts, especially the cabin needs a sharp eye to distinguish between what can be sanded off and what should remain. So always have look on drawing and photos. The cabin interior is done from AFV-Club parts as well as special parts from the conversion kit, as the seats (which should be glued most forward of their possible areas) and the new steering wheel. The joining of upper and lower part of the was a bit problematic cause the engine compartment wall didn't wanted to fit as it should. Here some sanding is needed. Around these steps the interior can be painted as it gets harder and harder the more you proceed.
 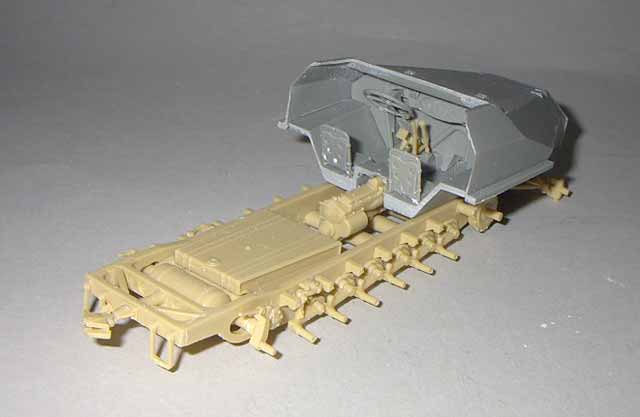 The cabin itself fits good to the chassis of the base kit. The front fenders should be fitted to the cabin only after it is glued to the chassis and the steering shafts are attached as you need to cut out a small piece from the left fender. At this stage the front axle is constructed and put into place ... looks good, but is not movable as we know such from Tamiya halftrack models.
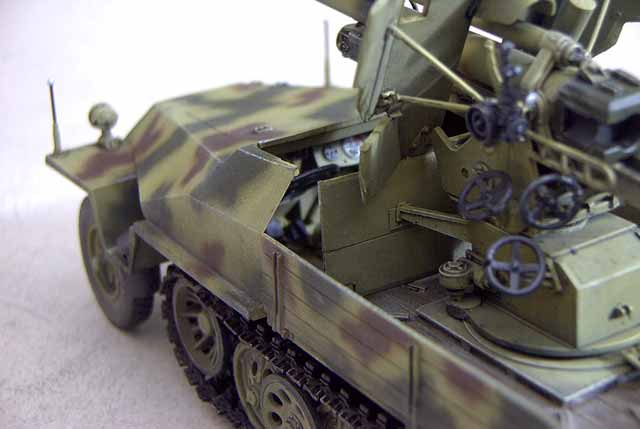
Next item is the platform ... the four parts that connect the platform to the chassis need to be cut very careful as any incorrectness leads to uneven parts and this may cause later a bent platform. The side plates of the platform can be used up- or downfolded ... I used the upfolded variant what has the disadvantage that the gun could not be turned 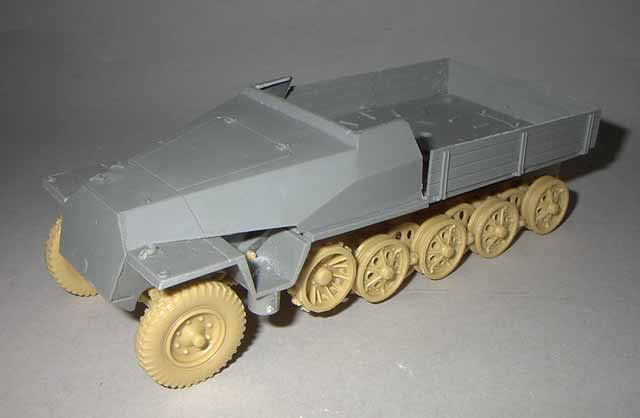 later.
The fitting of the platform to the chassis then is not so easy because you have to look in all areas if it has contact and is absolutely even in all dimensions. Additionally you have look that it fits direct to the drivers cabin. I had a little gap later but this is no problem at all. So before gluing you need dry fitting and sanding.
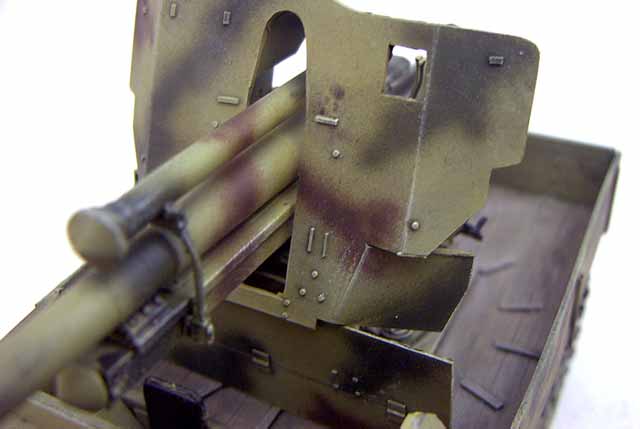
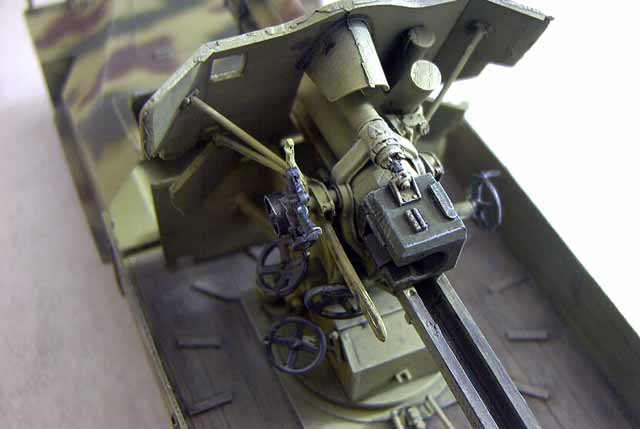
Next step is the construction of the leFH, which has most parts. I was irritated by the instruction showing single parts to be glue together which are already one piece. This saves time if you don't spend it with looking for those pieces! For attachment of the turned metal barrel you need to drill a hole in the gun breech or cut off the nipple on the barrel. The muzzle break is made of two halves where you need to be cautious that you receive two exact halves after cleaning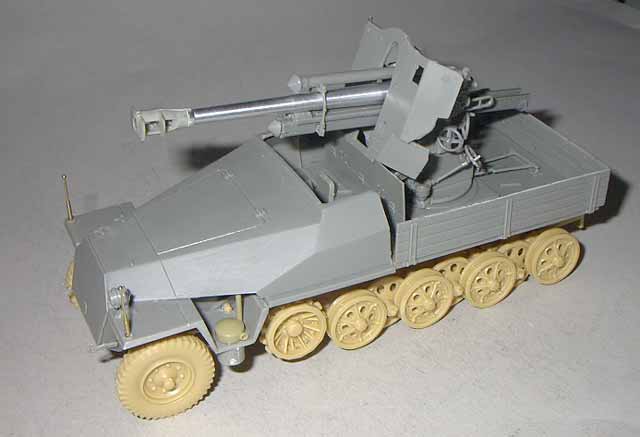 g them up, so you can get a muzzle break which fits together without gaps ... not easy.
Before the small forward crossbeam is fixed to the gun-slide and upper cylinder, the barrel should be glued (while the instruction shows nowhere WHERE exact it needed to be positioned ... of course it is located right to the front.) and the whole then put through the gun shield, cause with the attached crossbeam it won't go through the hole of the gun shield.
Before that you should assemble the gun cradle which needs most parts as handwheels and shafts. Both side parts of the cradle fit good to the bottom plate but the gun itself needs some forcing to go into the holes. The drawing of the front right side of the gun cradle was some kind of irritating ... it shows a cylinder with its barrel which is hard to figure out what and where! The gunshield can then be glued finally, not easy but possible. It's important that it has contact in the lower area and fits together with the shield of the socket.
The last step of the gun is the socket where you need to shorten the two beams a bit to prevent this shield to be too far forward and collide with the seats. Then the cannon is placed onto the socket which is then brought onto the platform!
After painting there are the tracks to put on. The base kit has a nice vinyltrack which could be painted and assembled very quick. Note that they are destined for left and right because of different lengths.
I tried the track set AFV-Club 35044 "Zgw 50/280/140 (early Version) for Sd.Kfz.11 and Sd.Kfz.251" which can be obtained for about 18 Euro from Kratz-Modellbau. Of course this makes much more work with cleaning up and painting. I hoped to get a workable 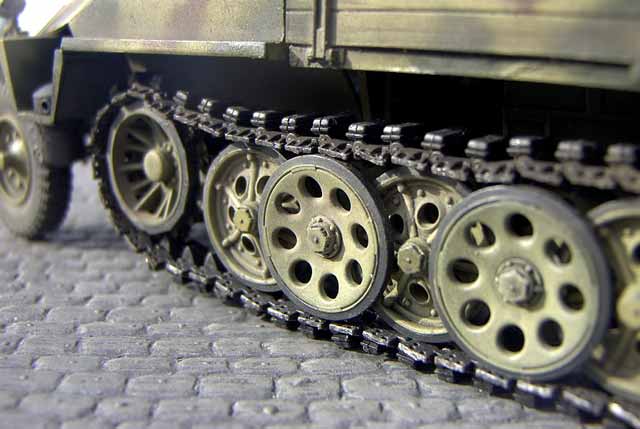 track with perfect details. The details are very good, but the construction was way hard. First the track pads (made from rubber) need to be glued to the single links (here it's easy to glue them oblique without noticing it at first) and then hook each link to the next. Here you be cautious not to break the small "noses" that hold the link, or even the link itself.
After all the track is workable but relative stiff and easy to disassemble especially when trying to connect the track on the running gear to one piece! Additionally it seems that the track is half a link too long/too short ... with one number of links it is impossible to close the track because it is too short, one link more makes it too long so it makes "waves" on the upper side.
With the track the construction is finished.

| Painting/weathering |
 For painting I tried to make a relative sharp three tone scheme like it is seen on the few pictures of the original.
The kit is primed with Tamiya XF-1 Flat Black. Then it is coated with Tamiya XF-60 while the lower chassis areas get a darker shade.
The camouflage then was done with Tamiya XF-13 green and XF-64 brown using the finest needle for the airbrush and very short distance. The pattern on the right side is similar to one picture I have seen ... the other sides are free interpretation.
The drivers cabin was painted inside also in sand yellow. Levers, instruments, panels and seats were then recolored with the brush. The wooden platform was painted with Revell #87 and after drying it was irregular painted with very much thinned brownish Tamiya colors.
After that the whole vehicle was washed with turpentine/dark oilcolors to make deepenings better visible. Especially the wooden platform looks much better after that. The drybrush then was done with brightened yellowish oilcolor.
The track was also primed black before assembly. Then it is oversprayed with Modelmaster Metalizer steelblue and drybrushed with metalcolor from Revell. Finished with a wash of dark pastel chalk dust and spirit.
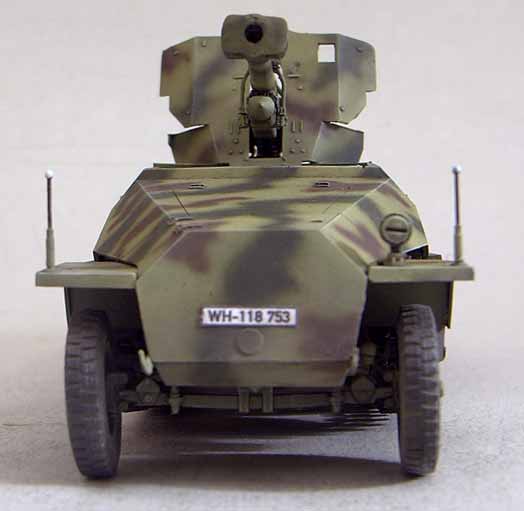
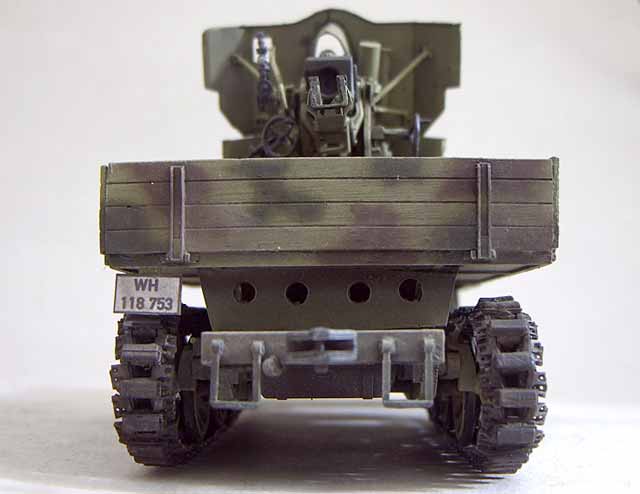
It is doubtful if this preproduction vehicle would have had any markings only a license plate with a number from the range of Hannover where hanomag was located. I have done these at the computer, printed and glued to the vehicle. Because rear fenders are lacking I made a number plate holder by myself for the rear.
Finished with some light dust from pastel chalks!
| Conclusion |
An extraordinary vehicle, no doubt. Looks strange with that cannon but a nice eyecatcher for the collection. The base kit from AFV Club is very good although it is vexatious that you only need a few parts from such expensive vehicle.
The conversion kit brings some very good parts that fit good to the base kit. With 47 Euro for this it is not cheap but adequate for what you get.
For all who like odd vehicles is this a kit that should not be missing in their collection!
Base vehicle Sd.Kfz.11:
| Price / value: | ***** | Parts fitting: | ***** |
| Details: | ***** | Skill level: | ***** |
Conversion kit:
| Price / value: | ***** | Parts fitting: | ***** |
| Details: | ***** | Skill level: | ***** |
 |
 |
 |
 |
 |
 |
 |
 |
Lierature:
© 10/2002 Thomas Hartwig
Thanks to New Connection for the sample